Most wraps that go wrong, go wrong for the same handful of reasons. We see them on cars that come in for refresh work or removal after a bad install. The good news is that nearly every common wrap mistake is preventable if you know what to watch for.
Here is the list, in rough order of how often we see each one cause real problems.
Table of Contents
ToggleSkipping the prep
Surface prep is the single most important step in a wrap install. A wrap is only as good as the surface underneath it. Wax, sealant, road grime, polish residue, even silicone overspray from a previous detail job all interfere with the adhesive.
The right prep on a daily driver looks like this. A two-bucket wash with degreaser. A clay bar pass. An IPA wipe down or a dedicated panel prep solvent. Then the panel is ready for vinyl.
A car that arrives at the shop and gets wrapped that same hour without proper prep will usually start lifting at the edges within months. We will not skip prep. Anyone who does is setting up your install to fail.
Wrapping over damage
Vinyl wraps follow the surface. A dent, a chip, a paint scratch, even significant orange peel will telegraph through a wrap. Satin and matte show body imperfections more than gloss does.
If your car has noticeable body issues, address them before the wrap. Pull the dent. Touch up the chip. The wrap is not going to hide it. Worse, vinyl over a damaged area can lift sooner because the surface contour is broken.
We will tell you up front when something needs to be addressed before we wrap it.
Using the wrong vinyl
There are two general categories of wrap vinyl. Cast film is the right choice for vehicle wraps. It is conformable, flexible, dimensionally stable over time, and has long-term UV protection. Calendared film is cheaper, less flexible, and designed for short-term graphics on flat panels.
Cars wrapped in calendared film for cost savings are the cars we see for early peel and shrink in the seams. We install 3M 2080 and Avery SW900, both cast vinyl, both with strong UV stability.
If a quote is dramatically cheaper than other shops in the area, ask what film they are using. The vinyl is most of the difference.
Wrapping over trim instead of under
A wrap that is “wrapped over” trim and bumper edges looks fine for the first few months. Then the edges start lifting because the adhesive does not have a clean surface to grip past the lip.
A proper install pulls trim where it makes sense, tucks the vinyl under, and reinstalls. It takes longer. It is worth it. The wrap stays put for years instead of months.
Door handles, mirror caps, and grilles are the same story. A pro install handles them as separate pieces, not as one big sheet stretched over them.
Stretching too hard at the contours
Vinyl can be stretched, but every percentage point of stretch reduces UV stability and adhesive grip in that section. A wrap that is stretched aggressively to wrap a deep contour will fail there first.
Skilled installers know when to use a relief cut, a separate piece, or a heat-and-relax technique to get a complex contour to lay without over-stretching. The work shows up in how the wrap ages.
If you see early lift on a deep curve, that is almost always over-stretch.
Skipping post-heat
After the vinyl is on the panel, it gets post-heated to lock the adhesive and let the film conform fully. Skipping post-heat is one of the more common shortcuts in a rushed install.
Post-heated wraps stay where they were placed. Wraps that did not get post-heated tend to creep at high-stress edges and seams.
The shop should be using a heat gun, not just an air gun, on every edge that wraps around a contour.
Washing it wrong from day one
Even a perfect install can be ruined by washing it wrong. The mistakes we see most:
Hand wash with pH neutral soap, microfibre dry, no wax, no harsh chemicals. That is the whole care routine. We send everyone home with the rules at install.
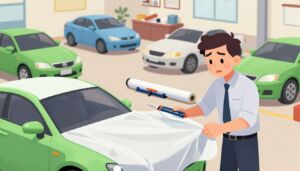
DIY wrapping a daily driver
Wrapping is a real skill. There is a reason a quality install is a multi-day job in a controlled shop. DIY wrap kits are out there, and they will work for accent pieces or short-term graphics.
A DIY full vehicle wrap rarely ends well. The vinyl is unforgiving, the prep is hard to do right at home, and contoured panels punish anyone who has not done a few hundred of them.
If you want a wrap on a car you actually drive, pay for a real install. The cost difference is meaningful, the result difference is bigger.
Picking based on price alone
The cheapest quote in the area is the cheapest for a reason. Often it is calendared vinyl. Sometimes it is no trim removal. Sometimes it is no post-heat. Sometimes it is all three.
A clean cast vinyl install with proper trim work and post-heat takes 4 to 6 days for a sedan. The labour adds up. Quotes that come in dramatically below market are skipping steps.
A full sedan wrap should land in the $2,800 to $4,000 range. Bigger or more complex vehicles cost more. If a quote is half that, ask why.
Not asking what film, what process, what aftercare
Three questions to ask any wrap shop:
If the answers are vague, walk away. A good shop will name the film by brand and product code, walk you through the prep and trim process, and hand you written aftercare guidance.
What we do at the shop
We install 3M 2080 and Avery SW900 cast vinyl. We pull trim, tuck edges, post-heat every panel, and walk every customer through aftercare before they leave. The shop is in Wylie and we see customers from Plano, Frisco, Allen, Garland, Rockwall, Murphy, Sachse, and Lavon.
Send photos of the car if you want a quote. We are happy to walk through the process and what the install will actually involve before you commit.
*This article was drafted with the help of AI and reviewed by the Shell Shocked Wraps team.*