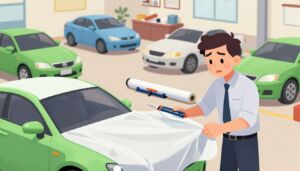
Wrapping your car can make it look amazing. But, it’s not as easy as it looks in videos. One installation mistake can mess up the whole look and even harm your car’s paint.
At Shell Shocked Wraps, a family-run, veteran-owned company, you’ll find experts. They do precision wraps, PPF, ceramic coatings, and window films. They use high-quality materials and have a 1-year no-B.S. warranty.
To get a perfect wrap, you must avoid wrapping technique errors. Shell Shocked Wraps’ team offers great customer service. They will help you through the process. Call them today to learn how to wrap your car correctly.
Key Takeaways
- Proper installation is crucial to avoid damaging your car’s paint.
- Shell Shocked Wraps uses high-quality materials and offers a 1-year warranty.
- Avoid wrapping technique errors by seeking professional help.
- Schedule a consultation to learn how to wrap your car correctly.
- Expert guidance is available to ensure a flawless wrap.
Table of Contents
ToggleThe Fundamentals of Quality Car Wrapping
Getting a top-notch car wrap is more than just sticking vinyl on your car. It takes skill, prep, and knowing your stuff about materials.
What Defines a Professional-Grade Car Wrap
A pro car wrap is tough, looks great, and fits your car perfectly. High-quality vinyl that doesn’t fade or crack is key. Plus, it must be put on right to avoid any mess.
Why Proper Installation Makes All the Difference
Getting it right is key because it affects how long and how well the wrap looks. Expert installers know how to handle tricky spots and get a smooth finish. They also dodge common issues like air bubbles and wrong fits.
Shell Shocked Wraps’ Precision Approach
At Shell Shocked Wraps, they focus on being precise. They use the latest tools and methods for a perfect job. A pro says, “A great wrap is more than just vinyl on a car; it’s a lasting piece of art.” They pay close attention to:
- Thorough surface prep
- Exact measurements and cuts
- Special care to avoid mistakes
| Aspect | Importance | Shell Shocked Wraps’ Approach |
|---|---|---|
| Material Quality | High | Uses top-notch vinyl for lasting quality |
| Installation Technique | Critical | Has expert installers with advanced skills |
| Surface Preparation | Essential | Does deep cleaning and prep |
By following these best steps, you can get a car wrap that looks amazing and lasts a long time.
Poor Surface Preparation: Setting Yourself Up for Failure
One of the most critical steps in ensuring a successful car wrap is often overlooked: surface preparation. Skipping this step can lead to a host of problems, including poor adhesion, bubbles, and a shortened lifespan of your wrap.
Essential Cleaning Steps You Can’t Skip
Before applying your car wrap, the surface must be thoroughly cleaned. This removes dirt, oil, and wax residue. These contaminants can prevent the vinyl from sticking correctly, leading to a subpar finish.
To clean your car’s surface, use a mild detergent and water solution. Avoid using harsh chemicals, as they can damage the paint or leave residues that interfere with adhesion.
Key cleaning steps include:
- Removing any loose debris with a soft-bristled brush or cloth
- Washing the car with a mild detergent
- Rinsing thoroughly to remove any soap residue
- Drying the surface completely with a microfiber towel
How to Properly Remove Contaminants and Residues
After cleaning, it’s essential to remove any remaining contaminants and residues. This can be achieved by using a surface preparation solution or an adhesive remover. These products are designed to eliminate stubborn residues without damaging the paint.
For more information on the best practices for car wrapping, including the debate between wrapping and painting, visit Shell Shocked Wraps.
Why Surface Temperature Matters More Than You Think
Surface temperature plays a significant role in the adhesion process. Applying vinyl to a surface that is too cold or too hot can affect the adhesive’s performance. Ideally, the surface temperature should be between 60°F to 80°F (15°C to 27°C) for optimal adhesion.
| Surface Temperature | Adhesion Quality |
|---|---|
| Below 60°F (15°C) | Poor adhesion, potential for bubbles and wrinkles |
| 60°F to 80°F (15°C to 27°C) | Optimal adhesion, smooth application |
| Above 80°F (27°C) | Risk of overheating, adhesive may become too aggressive |
Selecting the Wrong Vinyl: Not All Wraps Are Created Equal
Not all vinyl is the same. Choosing the wrong one can be a letdown. The vinyl you pick affects how long it lasts, looks, and works.
Navigating the Different Types of Wrap Materials
There are many vinyl types for car wraps. Cast vinyl bends well and is great for tricky shapes. Calendered vinyl is cheaper but not as tough.
Premium vs. Budget Vinyl: What You’re Really Paying For
Choosing between premium and budget vinyl is key. Premium vinyl lasts longer, keeps colors bright, and installs easier. A top expert says, “Good vinyl saves money by lasting longer.”
“The difference between premium and budget vinyl is not just about the price; it’s about the value you get over time.”
How Climate and Environment Should Influence Your Choice
Where you live affects your vinyl choice. In sunny places, pick vinyl with strong UV protection to avoid fading. In cold areas, choose vinyl that stays flexible in the cold.
Knowing about vinyl types and climate helps you choose wisely. This ensures your car wrap looks good and lasts. Picking the right vinyl is the first step to avoid common mistakes.
Measurement and Cutting Errors That Ruin Your Wrap
To get a perfect car wrap, you must learn to measure and cut well. Wrong measurements and cuts can cause a bad fit. This can be expensive to fix. We will talk about the tools and methods for perfect cuts and measurements. This will help you avoid common mistakes.
Tools and Techniques for Perfect Measurements Every Time
You need the right tools for accurate measurements. A flexible measuring tape is key for wrapping around tricky shapes. A digital caliper is also useful for precise measurements in small areas. Always take more than one measurement to check if it’s right, as one mistake can cause big problems.
Avoiding Common Cutting Mistakes
Cutting the vinyl right is as important as measuring it well. Use a good cutting mat and a sharp blade. Make sure to cut on a steady surface and use a ruler or straightedge for straight cuts. Don’t press too hard, as this can stretch or tear the vinyl.
Mastering Complex Curves and Contours
Working with complex shapes needs a special approach. Warm the vinyl with a heat gun to make it easier to shape. Be patient when dealing with tricky areas, as rushing can cause problems. Practice on small parts first to get better at it.
| Tool | Purpose |
|---|---|
| Flexible Measuring Tape | Measuring around complex curves |
| Digital Caliper | Measuring small, intricate areas |
| Cutting Mat | Stable surface for cutting vinyl |
| Heat Gun | Warming vinyl for complex curves |
Common Wrap Mistakes to Avoid During Application
Getting a car wrap right is all about the application. You need to be precise and patient. Knowing the common mistakes helps you get it right.
The Art of Proper Tension and Stretching
Getting the tension right is key when applying a car wrap. Too much tension can distort the wrap. Too little can cause wrinkles and bubbles. It’s important to apply even pressure and stretch the vinyl evenly.
- Start by applying the wrap to the center of the surface and work your way outward.
- Use a squeegee to smooth out the vinyl, applying gentle to moderate pressure.
- For complex curves, use a heat gun to relax the vinyl, making it more pliable.
Heat Gun Techniques: Finding the Right Temperature
Using a heat gun is key for car wraps. It helps the vinyl fit complex shapes. But, finding the right temperature is crucial to avoid damage.
Start with a low temperature and increase as needed. Keep the heat gun moving to avoid overheating.
Troubleshooting Bubbles and Wrinkles in Real-Time
Bubbles and wrinkles can still happen. The trick is to fix them right away. For small bubbles, use a pin and a squeegee to smooth out the area.
For bigger issues, apply more heat and use a squeegee to adjust the vinyl. Fixing problems as they happen ensures a smooth finish.
Mastering these techniques helps you avoid common mistakes. This way, you’ll get a professional-looking car wrap that makes your vehicle stand out.
Post-Installation Pitfalls That Damage Your New Wrap
After putting on a new car wrap, watch out for things that can harm it. Taking good care and keeping it maintained is key to keeping it looking great.
Understanding Proper Curing Time and Conditions
The curing time is very important for the wrap to stick well. Avoid exposing your wrapped car to extreme temperatures or direct sunlight during this time. It can mess with the stickiness.
Why Premature Washing Ruins Your Investment
Washing your car too early can mess up the wrap’s stickiness. Wait at least 24 to 48 hours before washing. This lets the wrap set right.
The Danger of Harsh Chemicals and Abrasives
Harsh chemicals or rough stuff can hurt the wrap’s surface. Use mild soap and soft cloths for cleaning. This keeps the wrap looking good.
| Common Mistakes | Consequences | Prevention |
|---|---|---|
| Premature washing | Adhesive compromise | Wait 24-48 hours |
| Using harsh chemicals | Surface damage | Mild soap and soft cloths |
| Exposing to extreme temperatures | Affects adhesive properties | Avoid direct sunlight and extreme temperatures |
Knowing about these problems and how to avoid them helps keep your car wrap looking great for a long time.
Neglecting Difficult Areas: Edges, Seams, and Complex Surfaces
Car wrapping is an art that needs precision and patience. It’s not just about putting vinyl on a car. It’s about making every part look perfect, even the tricky ones.
Specialized Techniques for Door Handles and Mirrors
Door handles and mirrors are hard to wrap. You need the right tools and to apply the vinyl just right. Start with the main surface, then work on the handles and mirrors. Use a heat gun to make the vinyl fit the shapes.
Conquering Bumpers and Intricate Body Lines
Bumpers and body lines can be tough. But with the right vinyl, you can get a smooth finish. Wrap in sections, using a squeegee to get rid of air bubbles.
Strategic Seam Placement for Invisible Transitions
Where you place seams is key for a pro look. Plan your seams to hide them. Use a precision cutting tool for clean cuts.
With practice, you’ll get better at car wrapping. Don’t worry if it takes a few tries to get it right.
DIY vs. Professional Installation: Making the Right Choice
Choosing between DIY or a pro for car wrapping is big. DIY is cheaper and fun, but it comes with risks. You need to know what you’re getting into.
Realistic Expectations for DIY Projects
DIY car wraps need time, patience, and skill. You’ll spend money on tools and materials. But, even with planning, things can go wrong.
DIY mistakes can harm your car’s paint. It’s not always a good idea.
Common DIY Disasters and How They Happen
DIY folks often mess up surface prep, vinyl tension, and tools. These mistakes make the wrap look bad and not last long.
| Aspect | DIY Installation | Professional Installation |
|---|---|---|
| Cost | Lower upfront cost | Higher initial cost, but long-term savings |
| Quality | Variable, dependent on skill level | High-quality finish, guaranteed |
| Time | Significant time investment | Quick and efficient |
Going pro with Shell Shocked Wraps means your car gets a precise and careful wrap. They use top materials and tools. This makes your car look great and keeps its value.
Maintenance Mistakes That Cut Your Wrap’s Lifespan Short
Keeping your car wrap in good shape is important. A well-maintained wrap looks great and protects your car’s paint. But, some mistakes can make your wrap wear out faster.
Your Essential Wrap Care Routine
Washing your wrap regularly is a must. Use a gentle soap and avoid harsh chemicals. Dry it well to stop water spots.
Recommended Wash Frequency:
| Driving Conditions | Wash Frequency |
|---|---|
| Normal driving conditions | Every 2 weeks |
| Heavy driving conditions (e.g., off-road, construction areas) | Every week |
| Coastal or high-pollen areas | Every week |
Protecting Your Investment from Environmental Damage
UV rays, salt, and pollution can harm your wrap. Use a UV-resistant coating. Also, waxing your wrap helps protect it from the elements.
Early Intervention: Addressing Minor Issues Before They Spread
Check your wrap often for damage. Look for tears, bubbles, or peeling. Fixing these problems early can help your wrap last longer.
By following these tips and avoiding mistakes, your car wrap will stay in great shape. It will also protect your vehicle for a long time.
Conclusion: Trust Shell Shocked Wraps for Flawless Results
Staying away from common wrap mistakes is key for a car wrap that looks great and lasts. Knowing the basics of car wrapping, getting your surface ready, picking the right vinyl, and keeping your wrap up are important. This way, you can have a perfect finish for many years.
Want to avoid common mistakes? Get advice from experts like Shell Shocked Wraps. They know how to do it right, making sure your wrap looks good and lasts long.
Choosing Shell Shocked Wraps means your car is in safe hands. They focus on quality and details, making them perfect for a flawless wrap.
Ready for a new look for your car? Contact Shell Shocked Wraps for a consultation or quote. See how expert advice can change your car’s look.